The *Definitive* Azure Marketplace Overview

There’s a lot to love…
Microsoft’s Azure Marketplace is a catalog of solutions where customers can locate, try and buy cloud applications from providers like NetApp. Buying, or Transacting, via the Azure Marketplace has a number of benefits for customers:
- Self-service procurement: customers can purchase, or Transact, within the Microsoft ecosystem.
- Standardized contracts: providers may elect to use Microsoft’s Standard Contract, which governs a straightforward relationship between the provider, Microsoft and the customer. With this, customers can proceed with trials and adopt new solutions at the speed they require to run their business. Since Microsoft is already approved as a vendor, this can often be done without needing any review from Legal or onboarding from Procurement.
- Leverage existing commitments: customers with an Enterprise Agreement often have a Microsoft Azure Commitment to Consume (MACC), meaning that they can leverage that commitment to pay for solutions on the Marketplace. This is often leveraged to facilitate pilots of new solutions without having to source net-new funding for an initiative!
Setting Yourself up for Success
The most successful cloud implementations go smoothly because the team involved completed straightforward tasks like reading prerequisites documentation and conducting a proper discovery. As cheesy as it sounds, it reminds me of a saying from one of my early coaches – win before you begin. Purchasing a solution via the Azure Marketplace is no different - watch the video below, which will show you how to find the items beneath it.
Proper RBAC Roles
An Azure Active Directory user needs to have either the Owner or Contributor role in order to purchase a solution via the Azure Marketplace.
Activating/Enabling a Subscription based on an Enterprise Agreement to leverage MACC
Customers can leverage a subscription created by their Enterprise Agreement (EA) to purchase services via the customer’s Microsoft Azure Consumption Commitment (MACC). While EAs are not a new concept to a customers, setting them up in order to enable Azure Marketplace purchases is often a new concept.
Managing EAs within the Azure portal has become a lot easier in recent memory – simply navigate to Cost Management + Billing, select your EA account and then Azure subscriptions to create a new subscription. Note: the image below doesn’t have the permissions required to create a new subscription, but if it did a New+ option would exist.
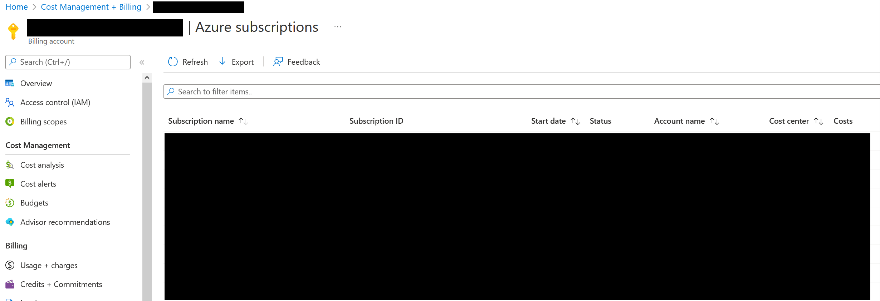
Creating a new EA subscription would be in the same row a Refresh, Export & Feedback.
Next, scroll down the left sidebar and select Policies – make sure that the following option is set to On.
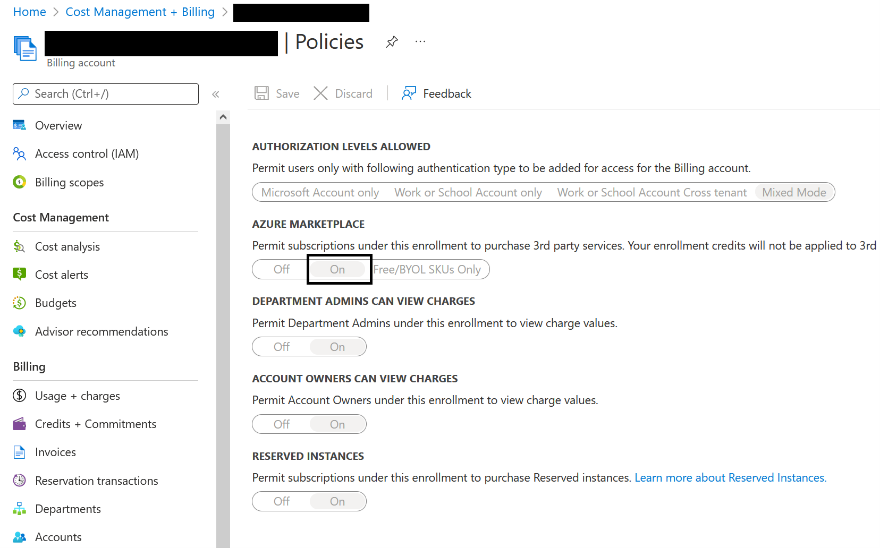
The most critical item to ensure success when attempting to draw down a MACC…
The steps above aren’t complicated, but they’re not entirely intuitive if it’s a customer’s first foray into the Azure Marketplace. NetApp’s familiarity with guiding customers through this purchase method means that we can guide customers through the entire experience with ease.
Private Offers and You
Publishers that provide discounts to customers - especially for substantial deals - do so in the form of a Private Offer. Watch the video below in order to figure out how to find the information required to receive a Private Offer, which is also outlined in bullet point form below.
Depending on the way your solution is set up, NetApp might require either your Billing ID, your Tenant ID or both. To locate your Billing Account ID, navigate to Cost Management & Billing, then Settings and then Properties. Copy the Billing Account ID to the clipboard, then paste it into an email and share it back to your contact at NetApp.
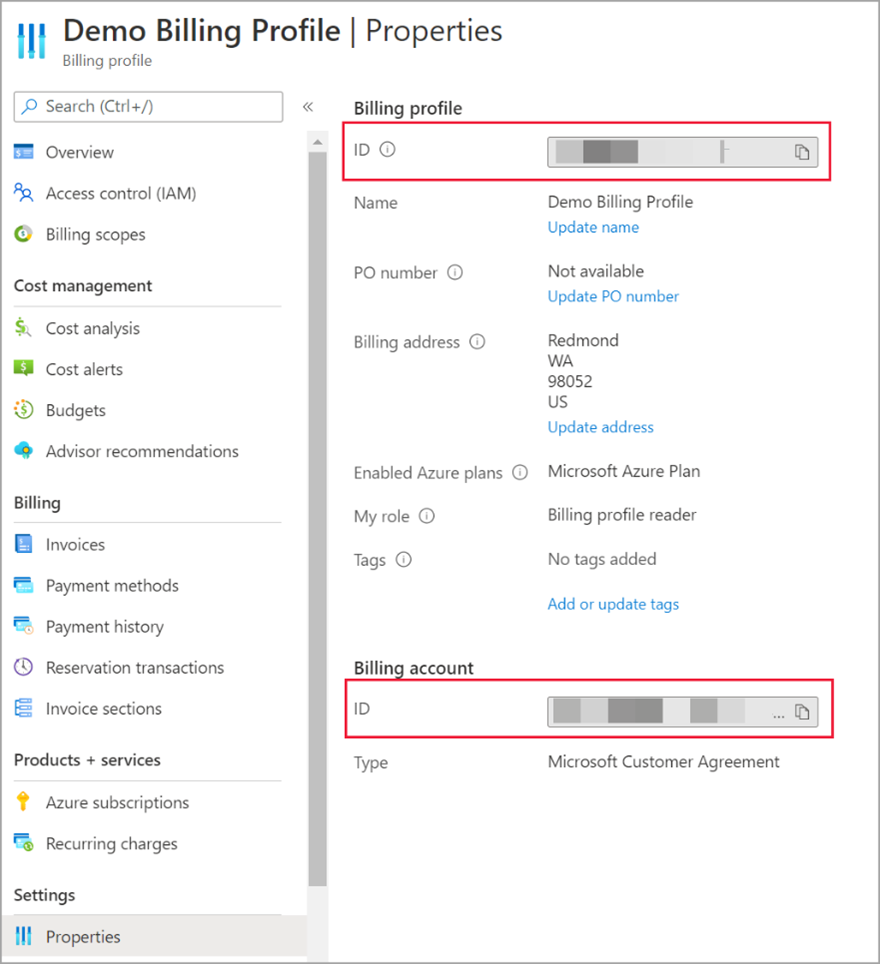
Billing account ID is what you want, NOT Billing profile ID…
Placing an Order in the Azure Marketplace
Watch the video below to see how to find and order a solution via the Azure Marketplace. You can also follow the steps outlined beneath the video as well…
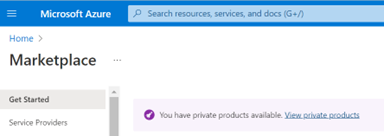
Navigate to the Azure portal, then search the address bar for Marketplace.
Private Offers appear in purple.
A list of all the products made available to you via Private Offer will be listed. Select the product you intend to purchase and click it to proceed. Note: not all Marketplace offer types have the same steps, but they are mostly similar. This example shows the purchase of a SaaS solution, which is NetApp’s most commonly used offer type.

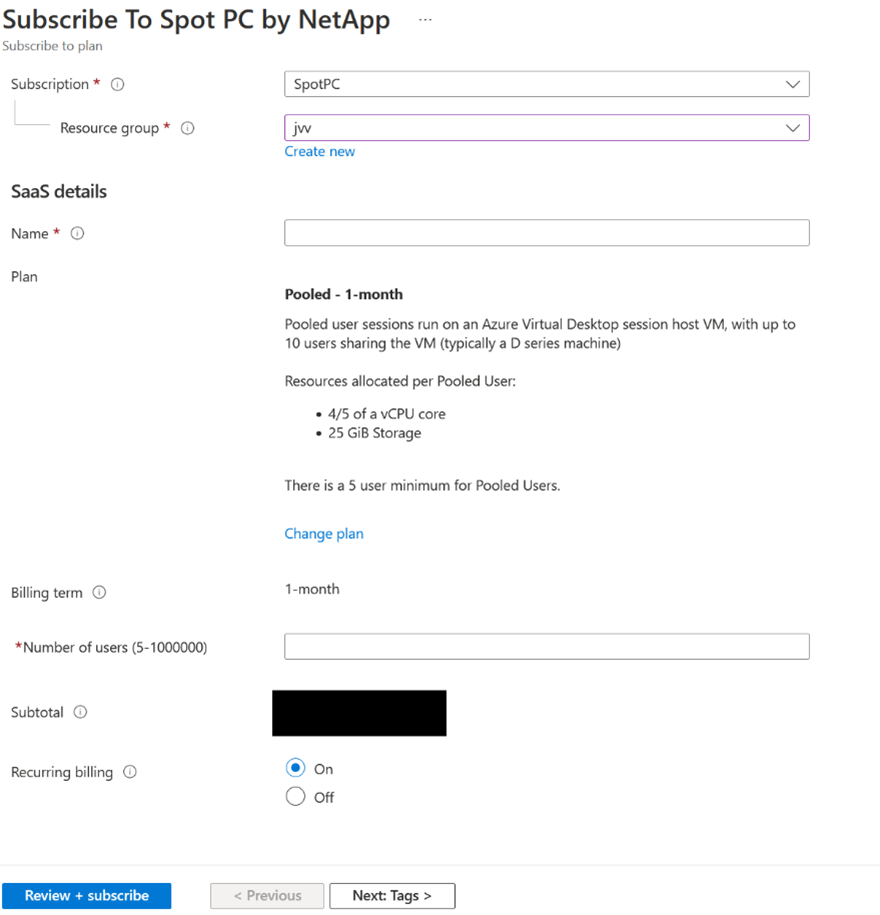
Choose the Plan you want, then click Subscribe to proceed.

Some listings have multiple Plans - make sure you’ve selected the right one.
Provide the details for your purchase – select the subscription and resource group you’ll use for the product and enter a quantity.
Pro tip: be very specific with the naming conventions for your purchase. For example, if you were purchasing Windows 365 licensing below you might use the name "W365 for East Coast Office". If it were a GPU SKU, you might use "Spot PC - GPU Users". This will come in handy when managing your purchases as time goes on.
Note: If you can see the Private Offer but don’t believe you’re getting a discount, double check the subscription you’ve selected – the Billing Account you provided earlier is tied directly to a subscription.
Click Review + subscribe to proceed.
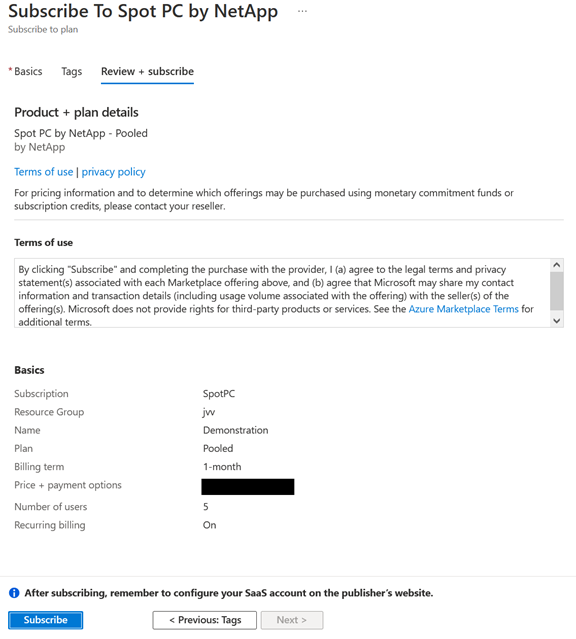
Skip Tags. Take one more look at what you entered previously, then click Subscribe to proceed.
Azure will now start processing the subscription to the service. Hang tight – this can take up to 60 seconds. Once it’s ready, the Configure account now button will turn blue.
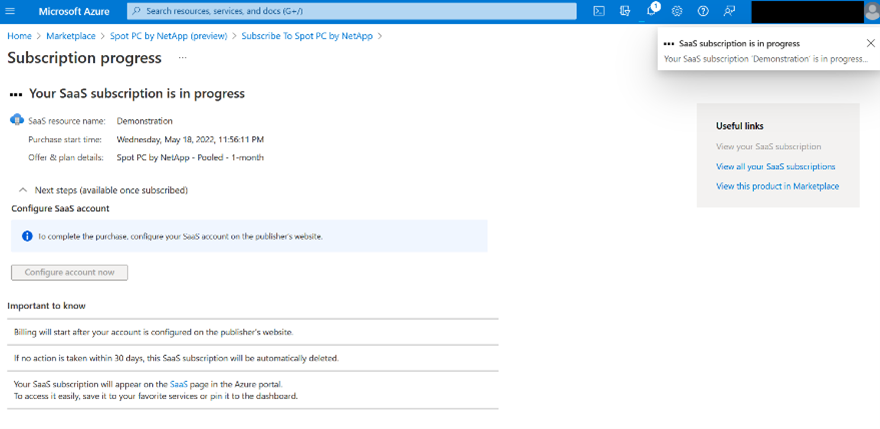
Be patient - it can take a while…
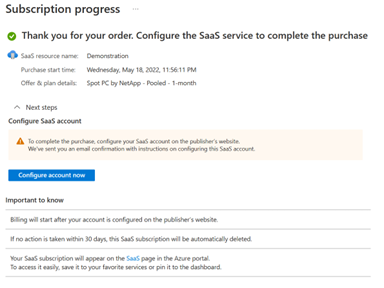
Now that it’s blue, click the button and you’ll be taken to the product’s landing page. Congratulations – you’re ready to start using your new solution.
Managing Solutions Over Time
Now that you’ve purchased and activated your solution, you’re off to the races and life is good! Aside from managing your newly purchased solution in its UI, you can also manage your Azure Marketplace purchases via the Azure portal. This is useful when it comes time to increase or decrease the quantity of units purchased, to cancel the service or to change the subscription and/or resource group the purchase is assigned to.
Watch the video below to see how you can manage your solution on an ongoing basis, or review each of the steps outlined below.
Note: not all Marketplace offer types have these management options, but they are present in the most common offer types – Virtual Machine and SaaS.
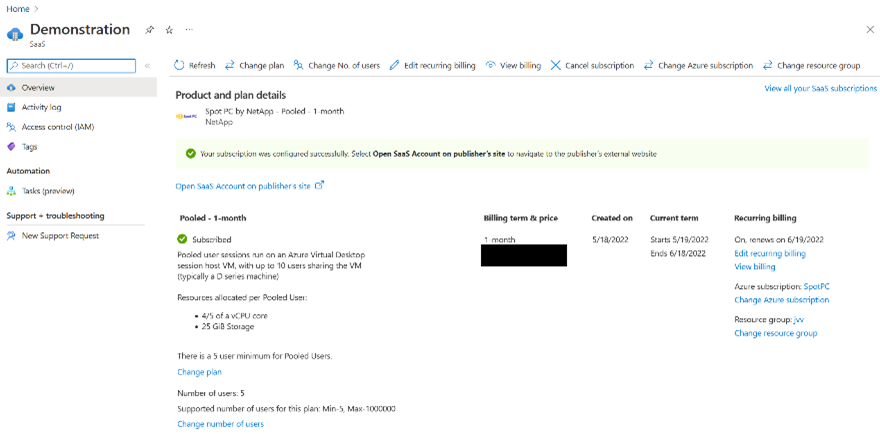
This is where applying naming conventions during the purchase process pays dividends – the names shown in the table appear as entered during the purchase process. Click the name of your newly purchased solution to see the options available to you for ongoing management of your purchase. Note: not all Marketplace offer types have these options, but they are present in the most common offer types – Virtual Machine and SaaS.
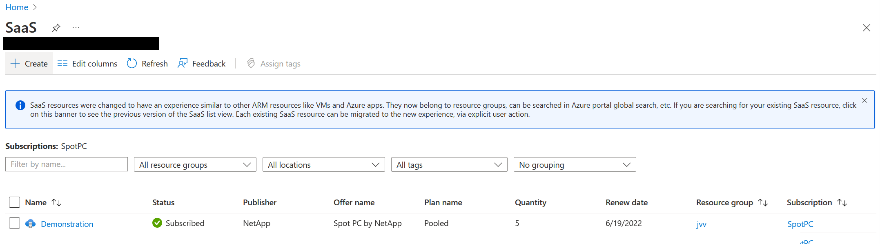
There are several options available – let’s review each one.
- Change plan: this would switch you from one of the purchase plans to another. Consult the provider of the service you’ve purchased – this may have unintended consequences or be disallowed altogether.
- Change number of users: this facilitates increases or decreases to a quantity of users. Common business examples include standard hiring activities and increasing/decreasing workforces for seasonal surges.
- Edit recurring billing: This can be set to On or Off, but use Off with extreme caution to avoid unintended downtime when a license renews. This may set the license that was purchased to an inactive state, halting functionality.
- View billing: This allows you to view billing related to this service.
- Cancel subscription: This displays a prompt that asks you to confirm the impact of cancelling the service and asks for the reason you’re cancelling.
- Change Azure subscription: This moves this purchase from one subscription to another. This can be used to manage cost centers as resource usage grows over time. Pro tip: review any impact this may have beforehand, as services under a subscription may be scanned by services (like Defender for Cloud) or have their logs imported into Log Analytics and/or Sentinel.
Change resource group: Similar to changing subscriptions, this moves the service from one resource group under a subscription to another resource group under the same subscription. This can also be used to manage cost centers as resource usage grows over time and may also have unintended consequences if moved.
That’s all for now! Yes, there’s more… but hopefully by now you have a better understanding of how to make sure the account that will make the purchase has the right permissions, make sure that the EA agreement has a subscription and allows Marketplace transactions, how to purchase a solution from the Marketplace and then manage it on an ongoing basis.
Let me know what Marketplace topics I should tackle next!